Practice Exam 2 - Project 5
Adventure Travel
A travel agency has hired you to modify a slide presentation on adventure travel in their area.
Task 1
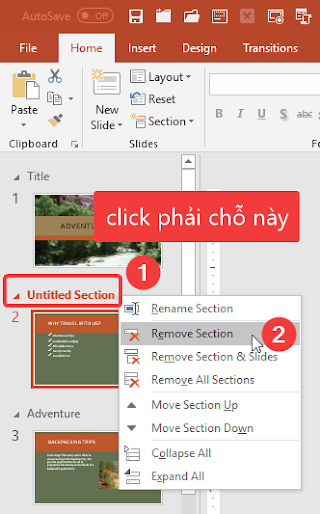
Rename the Untitled Section to "Intro".
Hint
-
In the Navigation Pane on the left, just below the title slide, click the section named, Untitled Section.
-
Right-click and select Rename Section.
-
Type the name, Intro.
-
Click the Rename button.

Task 2
Apply the Rotated, White style to the image on slide 3.
Hint
-
In the Navigation Pane on the left, select slide 3.
-
Click the image located on the right to select it and reveal the contextual tab.
-
On the PICTURE TOOLS FORMAT contextual tab, in the Picture Styles group, click Rotated, White.


Task 3
Reposition the center image on slide 5 to Align Middle and place it on top of the other two images.
Hint
-
In the Navigation Pane on the left, select slide 5.
-
Click the center image to select it and reveal the contextual tab.
-
On the PICTURE TOOLS FORMAT contextual tab, in the Arrange group, click Align.
-
Select Align Middle.
-
Then in the Arrange group, select Bring Forward and click Bring to Front.


Task 4
Use a feature in PowerPoint to correct all of the spelling errors in this presentation by changing RockCrawling to Rock Crawling, and Loging to Lodging.
Hint
-
On the Review tab, in the Proofing group, click Spelling.
-
Correct RockCrawling by accepting the suggestion Rock Crawling and clicking the Change button.
-
Correct Loging by selecting Lodging from the suggested list and clicking the Change button.
-
When you see the message that spell check is complete, click OK.


Task 5
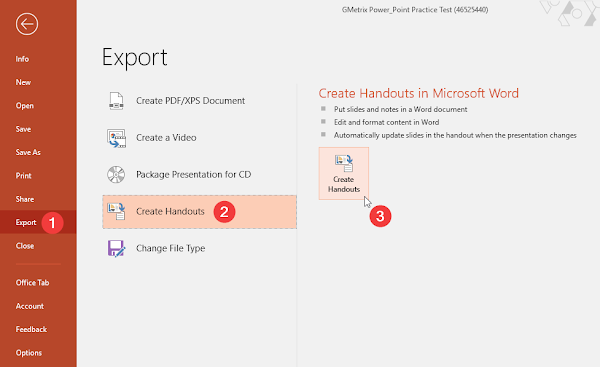
Create a handout by using a feature in PowerPoint to paste the slides into Microsoft Word. Display blank lines next to each slide on the handout. Name the document Handout.docx and save it into the GMetrix Templates folder. Close the Handout document after it has been saved.
Hint
-
On the File tab, select Export.
-
In the Export pane, click Create Handouts. In the pane on the right, click the Create Handouts button.
-
In the Send to Microsoft Word pop-up window, select Blank lines next to slides.
-
Verify that Paste is selected below the feature to Add slides to Microsoft Word document.
-
Click OK.
(Hint: It will take a moment for PowerPoint to generate the Word document).
-
In the newly created Word document, click File, then Save As.
-
Browse to the GMetrix Templates folder.
-
Name the File, Handout.docx and click Save.
-
Close Handout.docx.